

We know that clearing headings are not a difficult task. But if you are new to this, it can definitely become a hurdle. Everyone wants his document perfect and error-free. And to remove headings in word one must know the toolkit provided in word.
It can be made simple by using a few easy steps. Although there are many methods present in the digital world. These 5 methods we are going to discuss are the easiest of all of them and can be used by beginners. And also by professionals.

Table of Contents
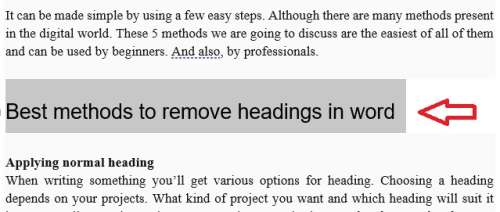
Best Methods to Remove Headings in Word But Keep Formatting
Applying normal heading
When writing something you’ll get various options for heading. Choosing a heading depends on your projects.
What kind of project do you want and which heading will suit it best. Depending on the work you want to do on the word. There are heading 1 to heading 9 to choose from.
You may also like How to Indent Second Line in Word Document
Step 1- Normal Text
Normal text is the very first option one can choose. In this type of heading in the word, almost every type of text can be written. You can easily choose this heading for your text.
By using this style you can convert any heading to normal text. This method makes your document look different from the previous one.
Step 2- Select the Heading
For selecting a heading, you first have to select the portion. Which do you want to change. After selecting the paragraph, choose the appropriate heading from the options.
You can also choose many headings in word document as per your need.
Step 3- Go to styles
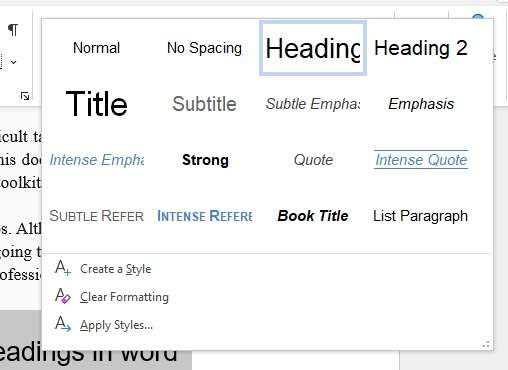
Step 3 says about finding the options. On the upper side of the toolbox, you’ll find different styles of heading on it. With the help of the cursor, you can select your favorite heading style. Normal style is the very first style you find there.
Step 4- Remove Headings
When you select your appropriate heading, you can eliminate all other headings. One by one you can remove your headings and can convert them with other text styles as per your requirement.
Step 5- Change the Entire Text
In case you want your document to look different, change the entire text. And remove the heading in word or want a new face for your doc.
You can just follow a few easy steps. Select the entire data from your cursor. You can also use a shortcut method i.e. CTRL+A for selecting the entire text.
And that’s it. Follow precious steps 3. And convert all your data in a single style.
You may also like How Many Words Are 6 Pages Double Spaced
Removing Heading with Dialog
If you want to insert a new heading or remove the previous ones. You can use this dialog box method for doing the same. Just follow these few simple steps and you’ll get what you want.
Step 1 – Where is the Dialog Box
Before doing anything else you’ll have to find the dialog box. In MS Word, you’ll find the dialog box in the upper section of the page. There are different styles present on the page.
You can choose them for a separate paragraph. Or you can select them for the entire text of your document.
Step 2- Open Style Dialog Box
Here we are going to tell you a shortcut key for opening the style dialog box. It is ALT+CTRL+SHIFT+S. By using this key, you can easily open the style dialog box.
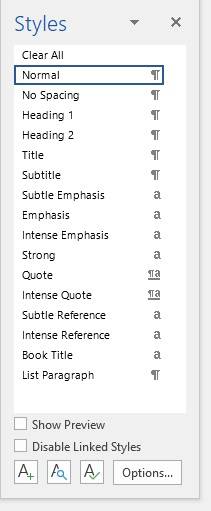
Just mark the text you want to change. Select the style from the box. Change the highlighted text.
Step 3- Clear all Headings
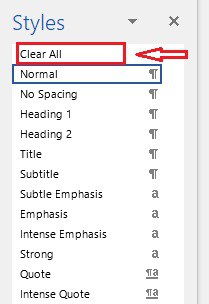
There is one option provided in the dialog box i.e., Clear all option. By using this option, you can remove headings that you have used before, after knowing how to select the perfect heading style. If you want to clear all the settings again. Choose clear all options in the dialog box and you are done.
Removing the Heading from the Navigation Pane
The navigation pane is normally not visible in word. Can help you remove the heading from your document. You just need to make sure that the navigation pane is visible.
Step 1- Finding the navigation pane
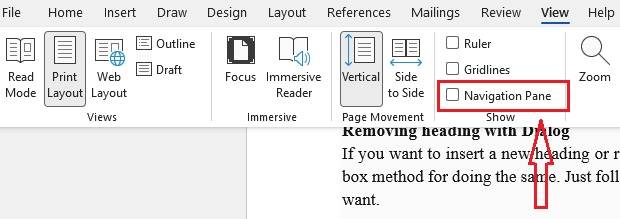
When the navigation pane is not visible on your page. You can go to the VIEW option present on the top side of the screen. There you’ll find so many options. You just have to click on the “navigation pane” option. And woah you are free to go.
Step 2 – Go to heading options
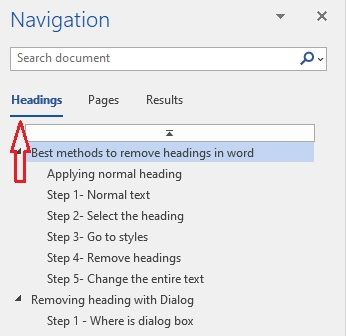
In the navigation pane, you’ll find the HEADING option along with the options like PAGES and RESULT. You can simply go to the heading option. And can choose your preferred heading.
Step 3- Delete the Heading
The navigation pane offers you so many options. Along with different styles of heading that you chose for your document. You also have one more option which is to delete the heading option.
If you do not want the same heading anymore. You can simply right-click. By doing the same you will see various options. You just have to select the delete heading option and you are good to go.
Remove Header Command
Remove headers in word is an easier task if you have learned how to remove heading in word.
Step 1- Click Insert
The INSERT option is present in the top left corner of your word screen. If you want to remove the header from your document. The first step is clicking the insert option which you easily find.
Step 2- Headers and Footers
After following the first step which is finding and clicking the insert option. You will see so many options inside the INSERT option.
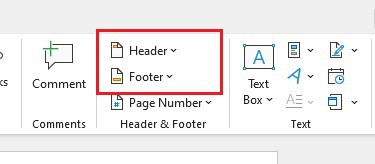
There is also a HEADERS and FOOTERS option. You just have to select the HEADER option.
Step 3 – Remove Header
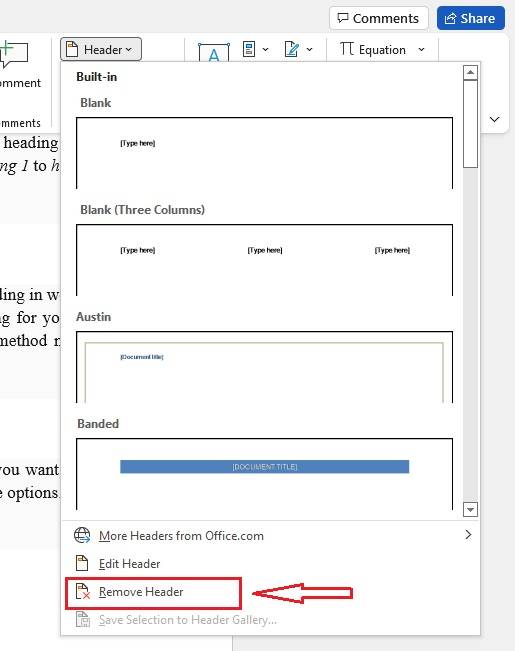
After clicking the headers option you will again get various options. When you go downwards you will see the REMOVE HEADER option there. And Woah! This is what you are looking for. Just click the remove header option and you will get what you want.
Remove all HEADERS
The time comes when you do not want any header in your document at all. And removing all headers one by one can be a time-consuming task. If you want to remove all the headers in one go. Just follow these few simple steps.
- Now you know where the header option is. You just go to the header option and double-click on it. By doing the same it will become editable.
- You just have to select the part from which you want to remove all headers. Mark the content and press the delete option on the keyboard.
- You will notice that all the headers are gone. This option of removing the heading word is the easiest of all. As you do not have to do much about it and can remove headings in word but keep the formatting.
Use Different Headers On Different Pages In Microsoft Word
FAQs
How do I remove headings in Word but keep formatting?
If you want to remove headings in word but keep the formatting. Then you just have to select that particular heading of your document and not the entire text. By this, you will only change the heading style of your document and not format the entire document.
How do you change headings to normal text in Word?
You can easily find the normal text option of heading on the very left corner of all heading styles. It is the first option they offer.
Also Check How to Add Grammarly to Word
How do I remove all collapsible headings in Word?
If you want to remove all collapsible headings in word. First of all, select the insert option on the top right corner of the word. Then select remove all headers from there. And you are good to go.
How to remove Word heading style without losing the formatting?
If you want to remove or change the heading style of your document without losing the formatting. Select that particular heading. Go to the heading styles options. And remove the heading. By this, you will lose formatting.
Scott Serrano has a computer science degree but he is a writer by profession. His writings are thoroughly creative, focused, and fully researched based. He loves to clarify people with his writing style and make them effective convince. In his free time, he is a very good football player as well.